
Dreamweaver CC 2019でCompassを使うための設定方法

今回はDreamweaverでCompassを設定する方法を説明します。Compassの開発は2016年に終了しているので本来であればAutoprefixerを使うことがベストです。ただDreamweaverではいまのところ未対応なのでベンダープレフィックスにはCompassを使用します。
DreamweaverでCompassの使うための設定方法
Compass以外の設定が終わっていることを前提に説明していきます。サイトを作成するための設定ができていない方は以下の記事に書いたので参考にしてみてください。


それでは説明していきます。
Compassに必要なファイルとフォルダを作成する
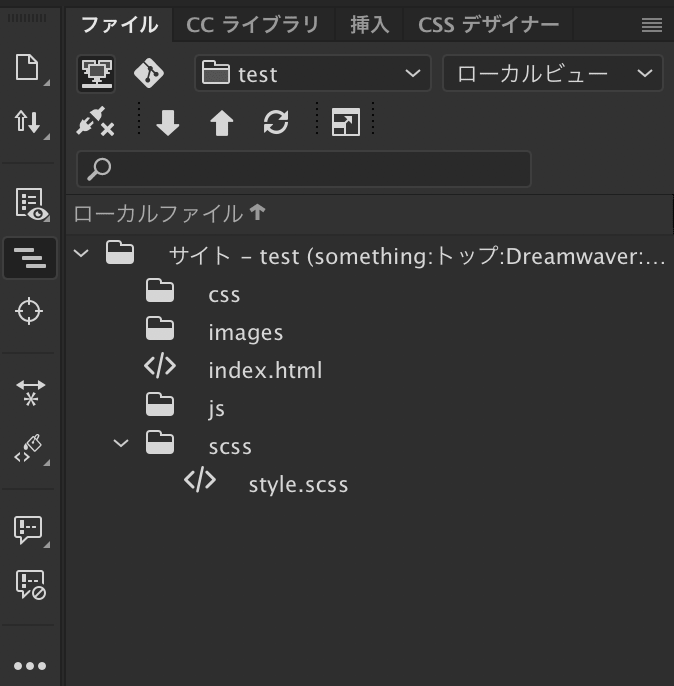
DreamweaverでCompassを使う場合、必要なフォルダとファイルがあります。以下のリストに沿って作成してください。
以下のリストを参考に作成しましょう。
- cssフォルダ
- scssフォルダ
- imagesフォルダ
- jsフォルダ
- index.html
- style.scss(scssフォルダの中に作成する)
作成すると以下のようになります。
最初にSassの設定をする
Compassを設定の前にSassの設定をしていきます。
以下の画像に沿って設定画面を開いてください。
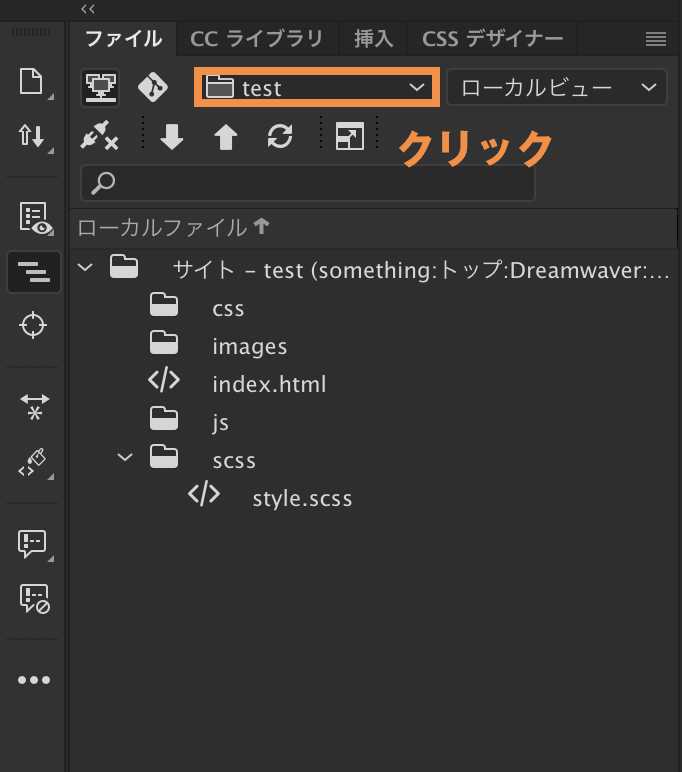
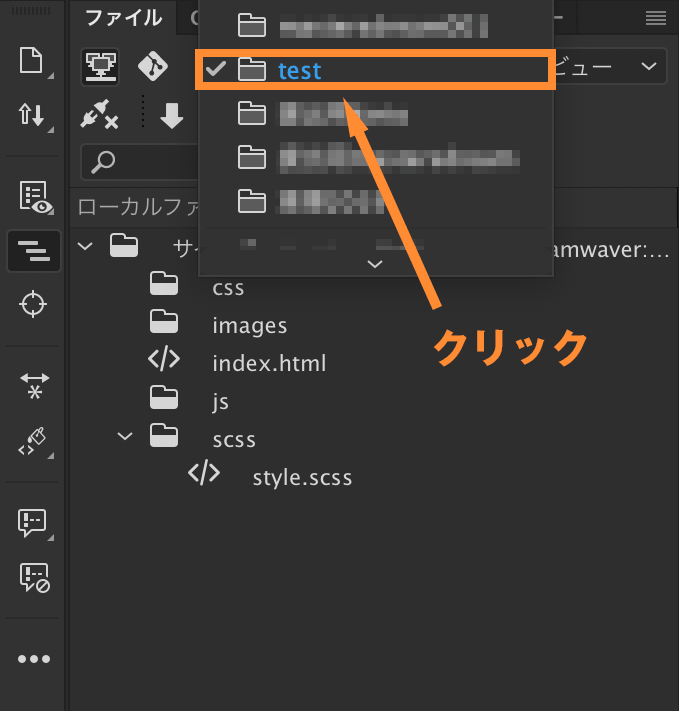
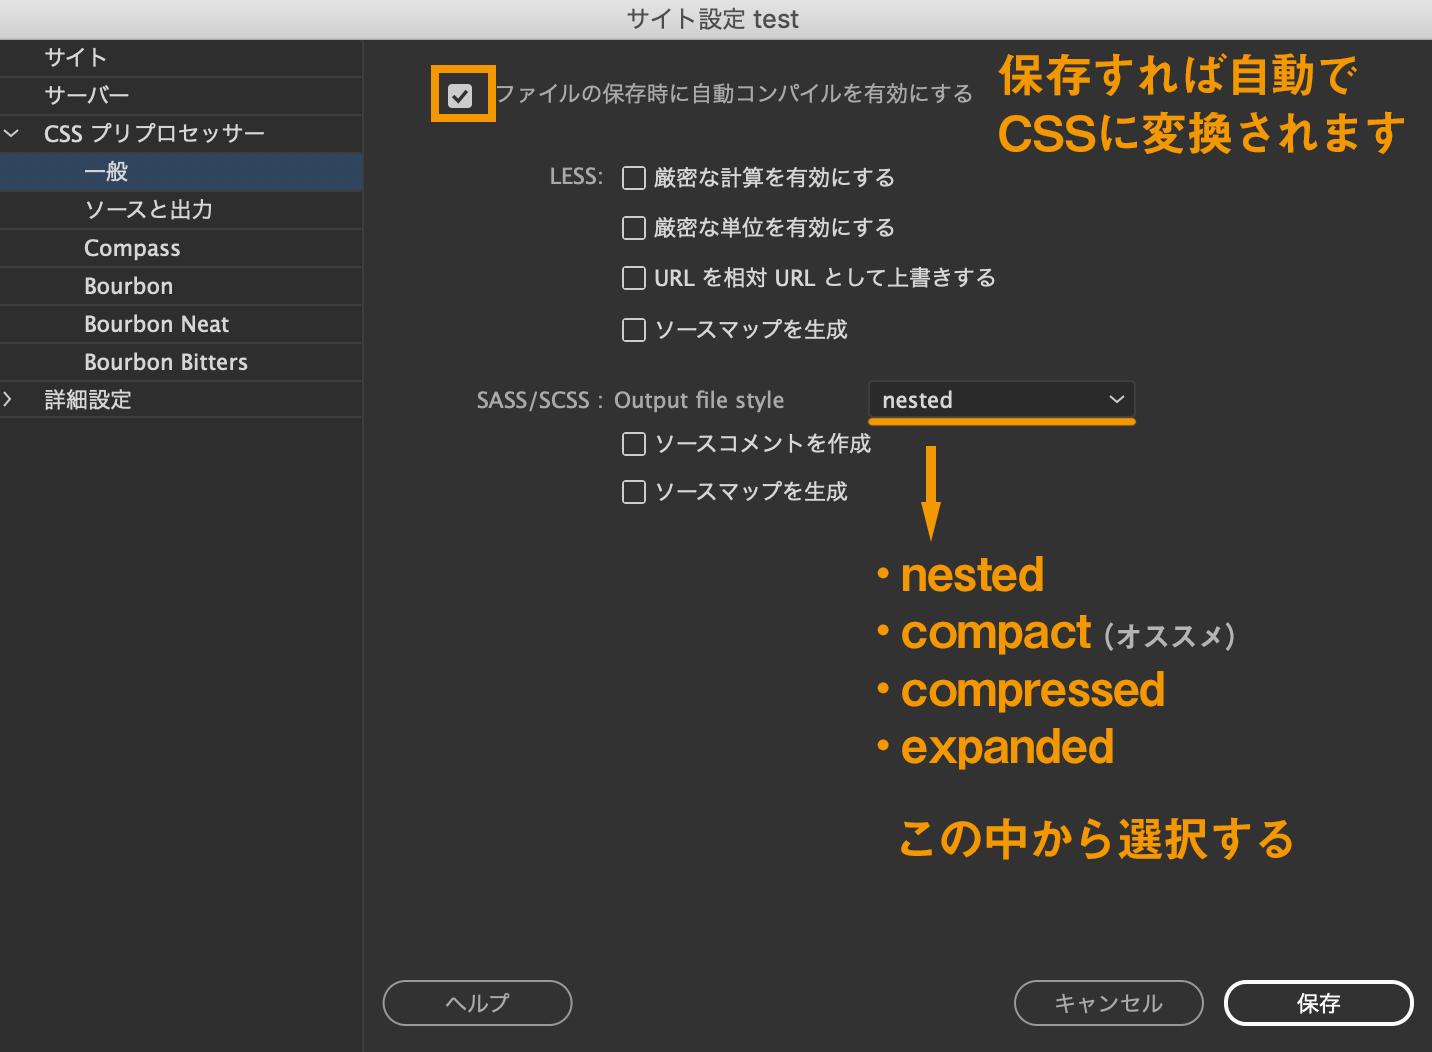
管理画面が表示されるので、【CSSプリプロセッサー】 > 【一般】 を選択します。nestedのところはcompactに変更しましょう。設定できても保存は押さないでください。
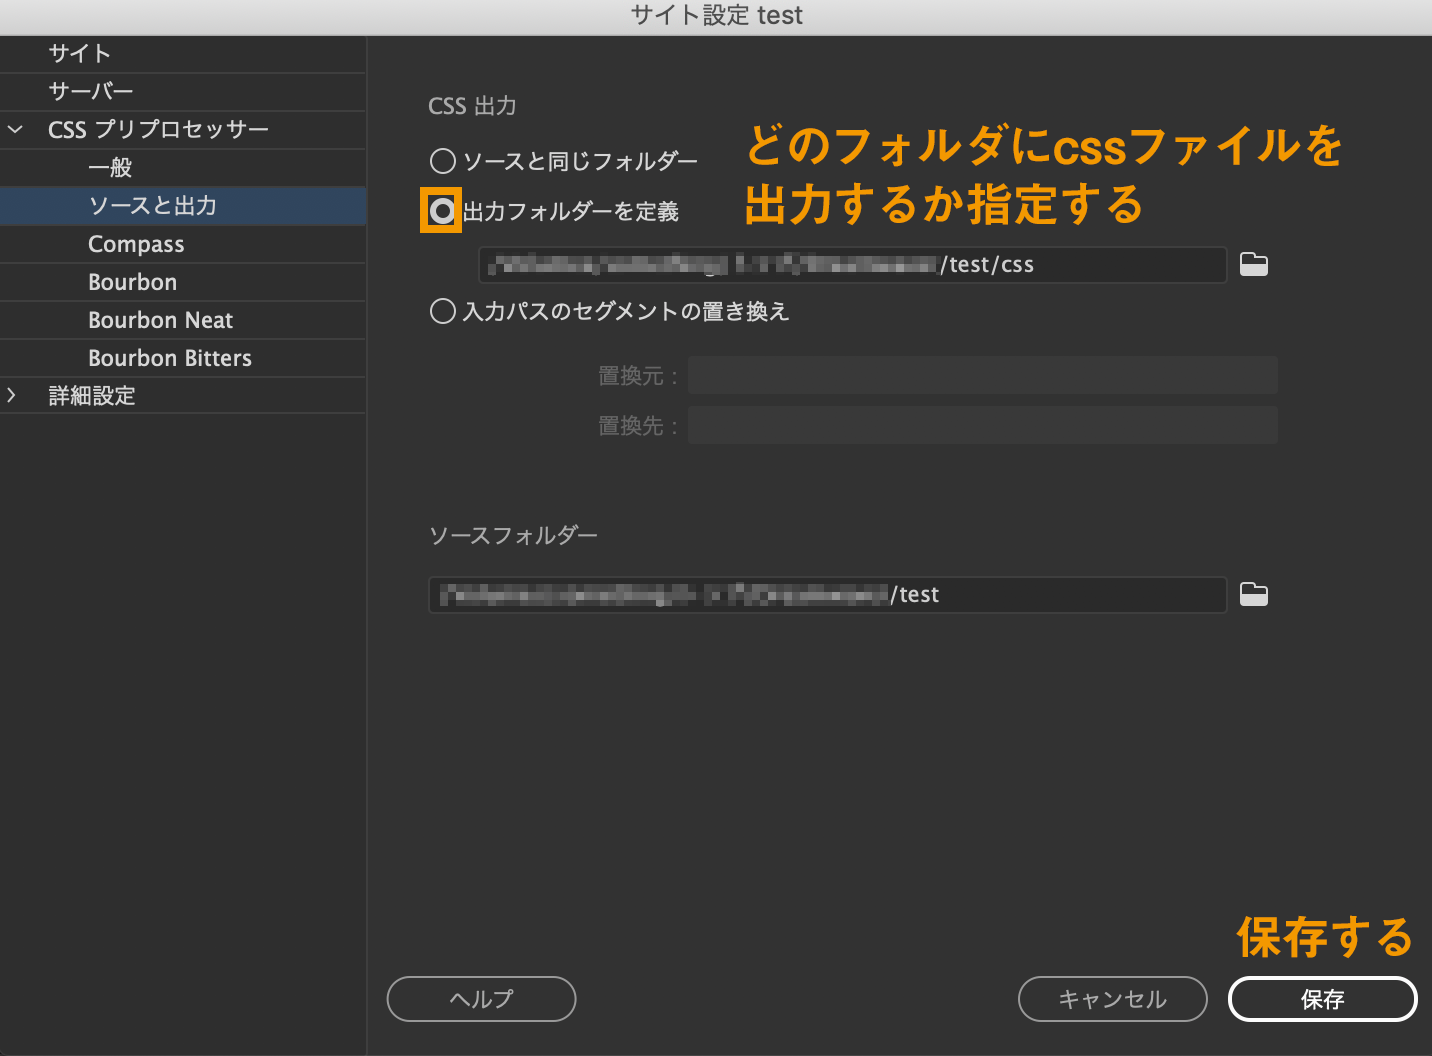
次に【CSSプリプロセッサー】 > 【ソースと出力】 を選択します。どのフォルダにcssファイルを出力するか設定します。cssフォルダの中に出力させるために下の画像とおり設定してください。設定ができたら保存を押します。
これでSassの設定は終わりです。次にCompassの設定をしていきます。
Compassの設定をする
まずはファイルを1つ作成します。ファイルは、右クリック > 新規ファイル で作成できます。名前と拡張子は以下のように変更しましょう。この段階ではファイルに何も書かなくて大丈夫です。
- config.rb
config.rbファイルが作れたら、Compassを読み込む設定をします。
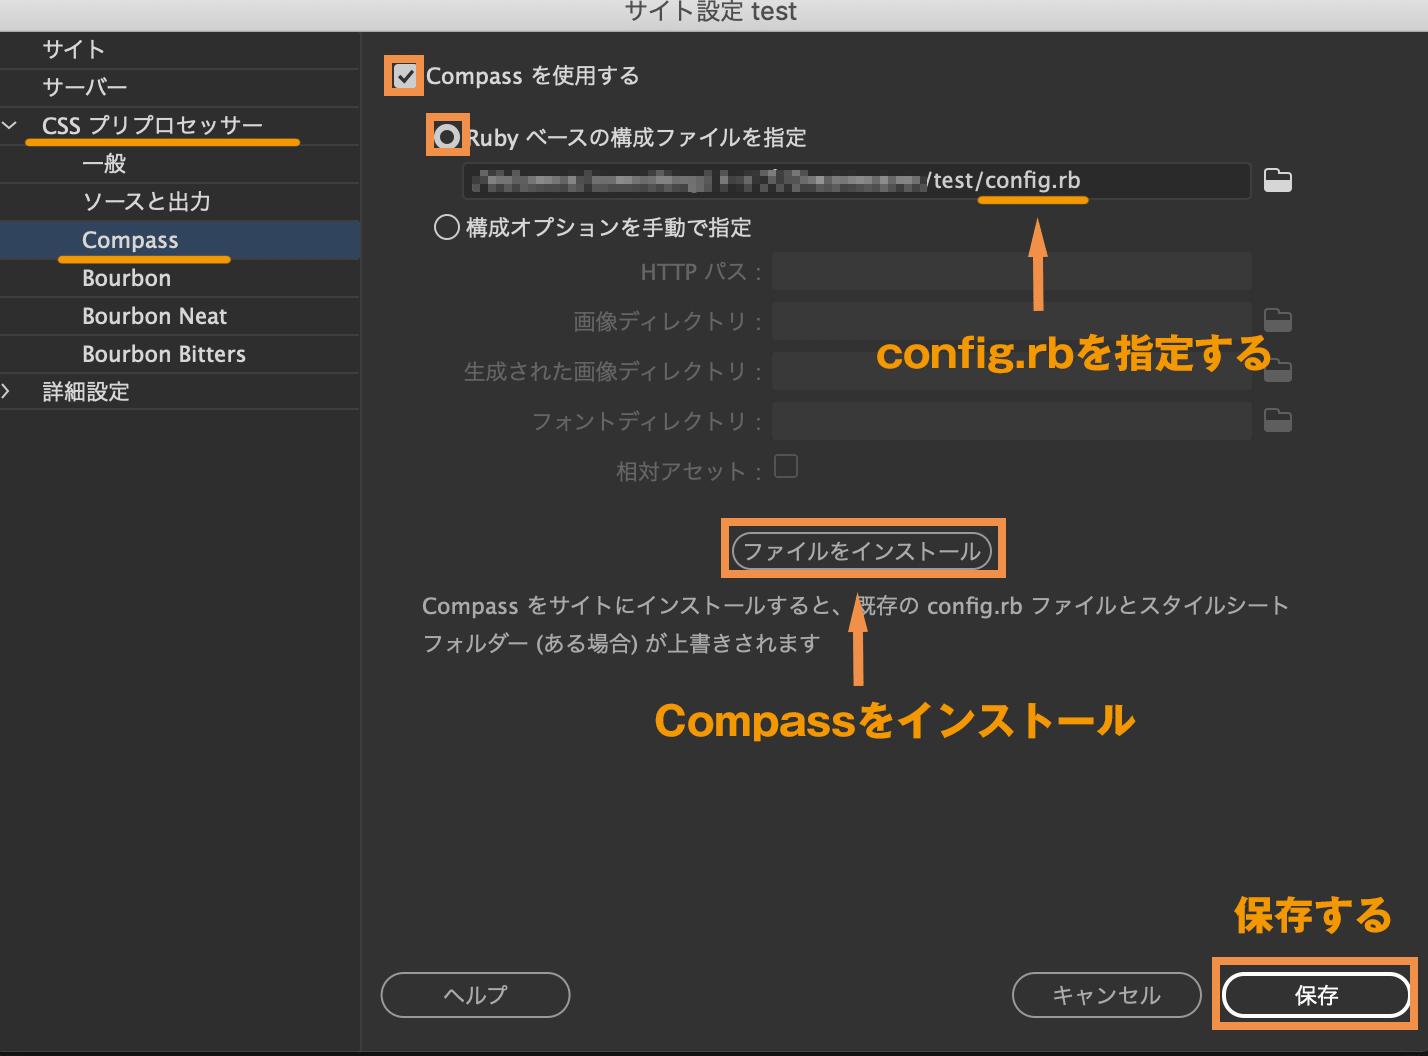
管理画面で、【CSSプリプロセッサー】 > 【Compass】 の順に選択します。
読み込むファイルはconfig.rbを選択しましょう。必ず【ファイルをインストール】からCompassをインストールすることを忘れないでください。
config.rbを書き換える
Compassがインストールされていると何も書かなかったconfig.rbに設定情報が入っています。この設定情報を以下のとおり上書きしてください。
Encoding.default_external = "UTF-8"
require 'compass/import-once/activate'

# Require any additional compass plugins here.
# Set this to the root of your project when deployed:

http_path = "/"
css_dir = "css"
sass_dir = "scss"
images_dir = "images"
javascripts_dir = "js"

output_style = :compact

# To enable relative paths to assets via compass helper functions. Uncomment:
# relative_assets = true

sourcemap = true
line_comments = false
relative_assets = true

# If you prefer the indented syntax, you might want to regenerate this
# project again passing --syntax sass, or you can uncomment this:
# preferred_syntax = :sass
# and then run:
# sass-convert -R --from scss --to sass  scss && rm -rf sass && mv scss sass
style.scssにCompassを読み込む
style.scssでCompassを使えるようにします。style.scssを開いて以下のコピペしてください。Compassが持つreset cssを読み込んでいますが、今回はstyle.cssにちゃんと反映されているか確認用につけています。
@charset "utf-8";
@import "compass";
@import "compass/reset/"; //compassが持つreset css。
style.scssを保存するとcssフォルダの中にstyle.cssが作成されていれば成功です。その他にいくつかファイルとフォルダが作られるので下の画面と比べてみましょう。
※ファイルとフォルダが作られるまで少し時間がかかります。30秒ほど待ってみてください。

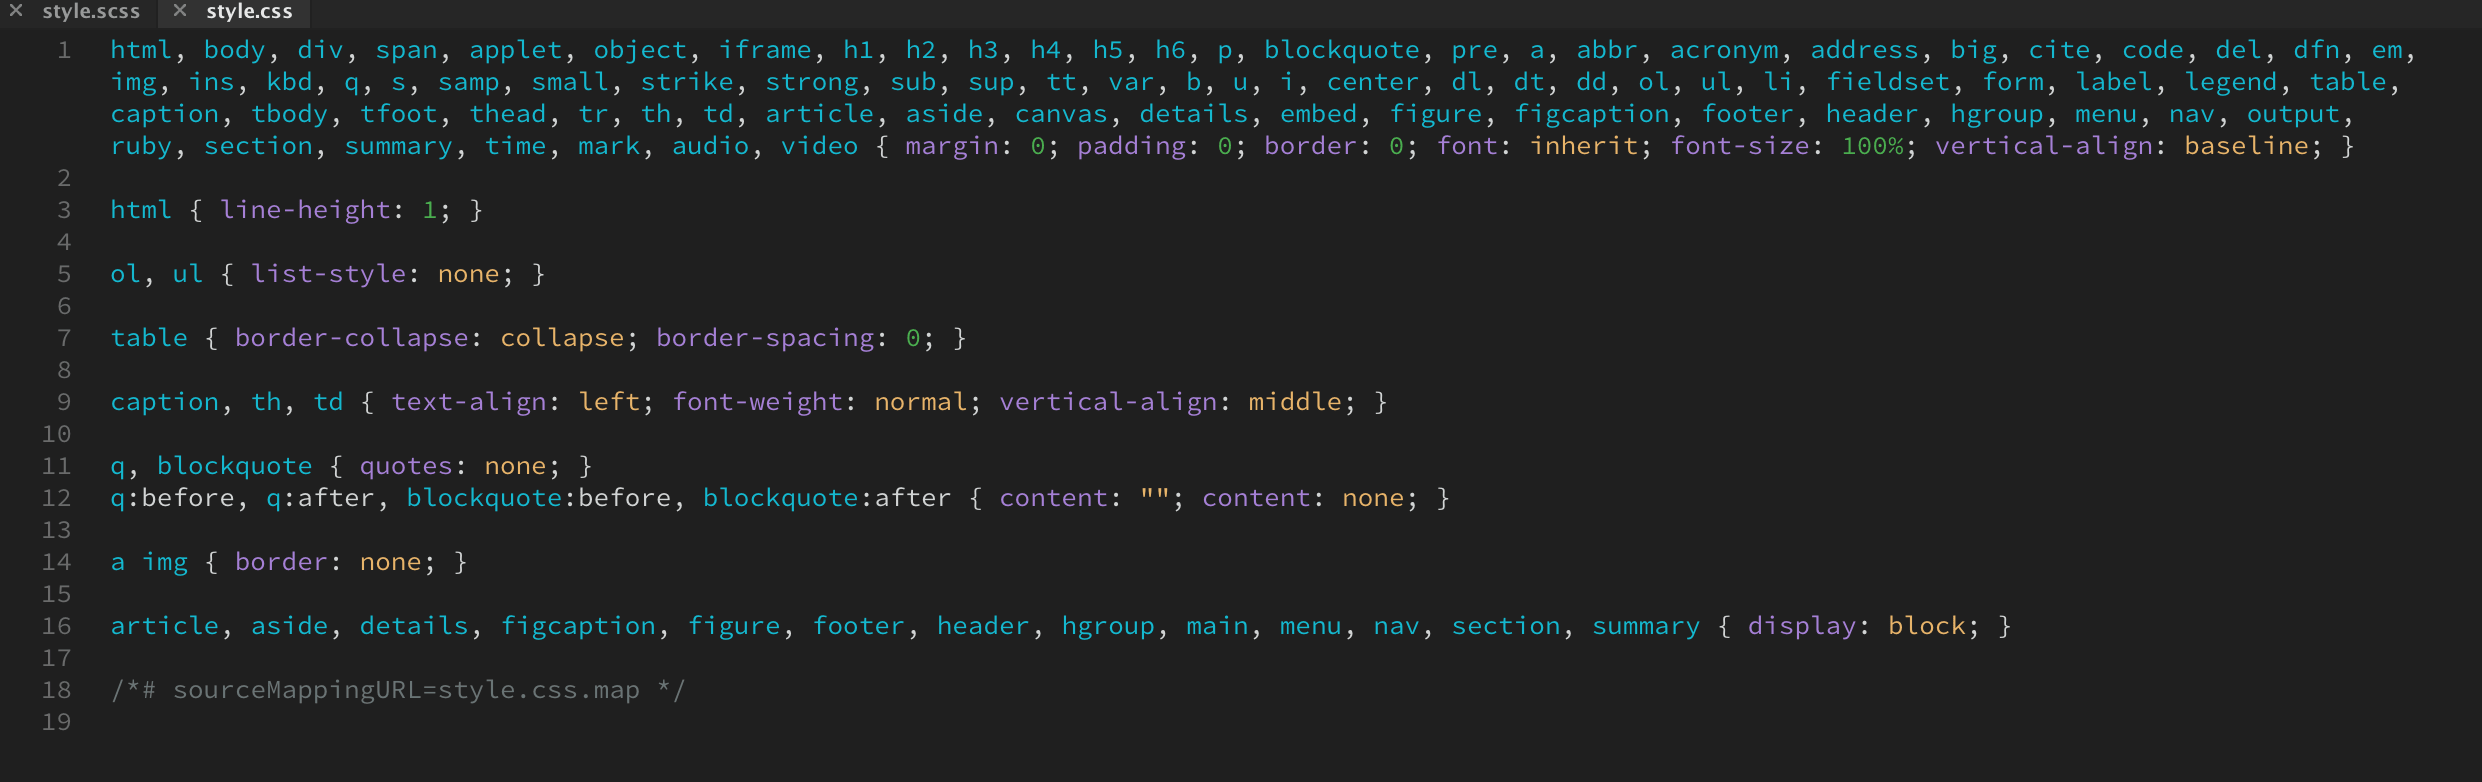
style.cssを開いて、Compassのreset cssが反映されているか確認してみてください。反映されていれば以下のような画面になります。
おわりに
今回はDreamweaverの管理画面からCompassの設定をしてみました。Compassは少し古いツールですが、使えるのであれば便利だと思います。ターミナルを触らなくても設定できるのでSassが使えるのであれば設定しておいても良いでしょう。


で手書き文字をトレースして書き出す方法")

