
Swiperでパララックス スライダーを実装する方法 - サムネイル付き
今回はSwiper.jsを使ってパララックスするスライダーの実装方法を紹介します。奥行きのあるスライダーを実装したい方にオススメです。
実装内容は以下。
- Swiperの8系を使用
- jQueryは使わない
説明環境は以下
- macOS Monterey 12.5.1
- Visual Studio Code v1.73.1
※2023.01.06追記
Swiperのバージョンを8系に変更しました。
Swiperを使ってパララックス スライダーの実装する方法
Swiperの8系を使って実装します
必要なライブラリを読み込む
今回はCDNを使ってSwiperに必要なデータを読み込みます。
<link rel="stylesheet" href="https://cdn.jsdelivr.net/npm/swiper@8/swiper-bundle.min.css"/>
<script src="https://cdn.jsdelivr.net/npm/swiper@8/swiper-bundle.min.js"></script>
npmでも読み込めるので詳しくは公式を参考にしてみてください。
HTMLで書くこと
スライダー部分とサムネイルが連動したHTML構造になります。
<div class="d-demo">
<div class="d-demo__heading">
<h1 class="d-demo__ttl"><img src="./images/img-swiper-parallax-main-ttl.svg" alt=""></h1>
</div>
<div class="d-demo__slider">
<!-- 本体swiper-->
<div class="swiper-container swiper-container-main js-slider">
<div class="swiper-wrapper">
<div class="swiper-slide d-demo__slide">
<div class="d-demo__slide-bg" style="background-image: url('./images/img-parallax-swiper-img01.jpg');" data-swiper-parallax-x="90%"></div>
<div class="d-demo__slide-heading">
<h3 class="d-demo__slide-ttl">SLIDER001</h3>
<p class="d-demo__slide-txt" data-swiper-parallax-x="30%" data-swiper-parallax-opacity="0">
Gorillas are ground-dwelling, predominantly herbivorous apes
that inhabit the forests of central Sub-Saharan Africa. The
genus Gorilla is divided into two species: the eastern
gorillas and the western gorillas (both critically
endangered), and either four or five subspecies. They are
the largest living primates.
</p>
</div>
</div>
<div class="swiper-slide d-demo__slide">
<div class="d-demo__slide-bg" style="background-image: url('./images/img-parallax-swiper-img02.jpg');" data-swiper-parallax-x="90%"></div>
<div class="d-demo__slide-heading">
<h3 class="d-demo__slide-ttl">SLIDER002</h3>
<p class="d-demo__slide-txt" data-swiper-parallax-x="30%" data-swiper-parallax-opacity="0">
The DNA of gorillas is highly similar to that of humans,
from 95 to 99% depending on what is included, and they are
the next closest living relatives to humans after the
chimpanzees and bonobos.
</p>
</div>
</div>
<div class="swiper-slide d-demo__slide">
<div class="d-demo__slide-bg" style="background-image: url('./images/img-parallax-swiper-img03.jpg');" data-swiper-parallax-x="90%"></div>
<div class="d-demo__slide-heading">
<h3 class="d-demo__slide-ttl">SLIDER003</h3>
<p class="d-demo__slide-txt" data-swiper-parallax-x="30%" data-swiper-parallax-opacity="0">
Gorillas' natural habitats cover tropical or subtropical
forests in Sub-Saharan Africa. Although their range covers a
small percentage of Sub-Saharan Africa, gorillas cover a
wide range of elevations.
</p>
</div>
</div>
<div class="swiper-slide d-demo__slide">
<div class="d-demo__slide-bg" style="background-image: url('./images/img-parallax-swiper-img04.jpg');" data-swiper-parallax-x="90%"></div>
<div class="d-demo__slide-heading">
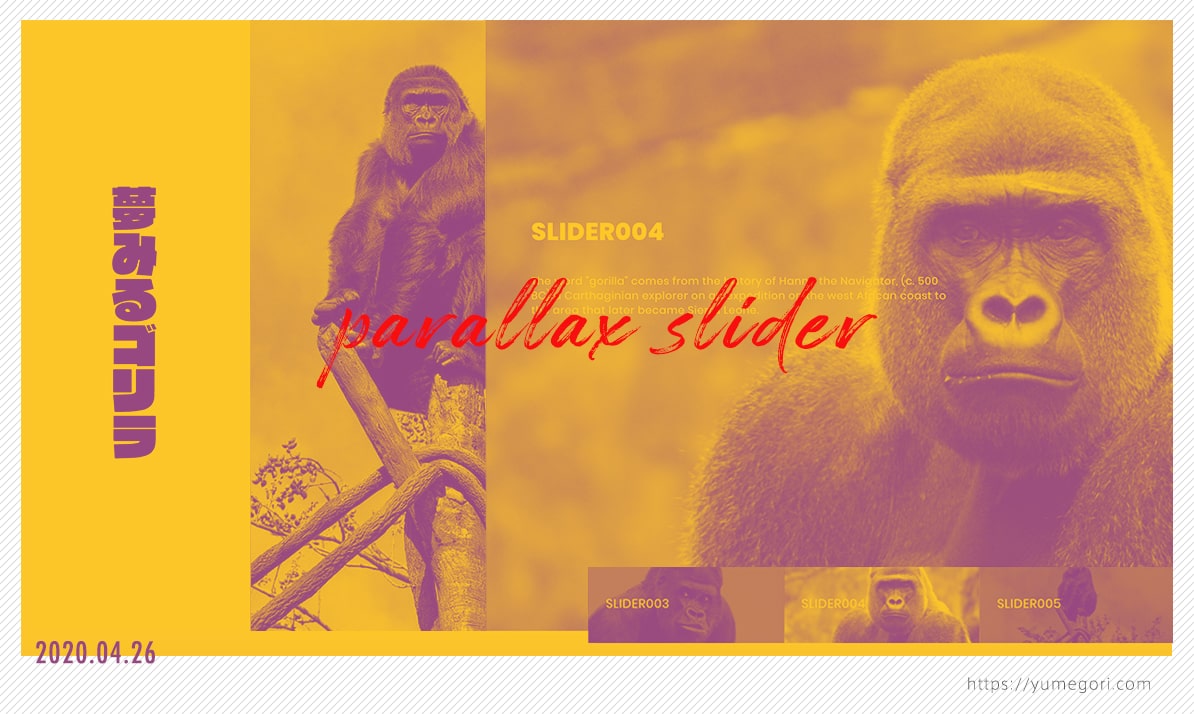
<h3 class="d-demo__slide-ttl">SLIDER004</h3>
<p class="d-demo__slide-txt" data-swiper-parallax-x="30%" data-swiper-parallax-opacity="0">
The word "gorilla" comes from the history of Hanno the
Navigator, (c. 500 BC) a Carthaginian explorer on an
expedition on the west African coast to the area that later
became Sierra Leone.
</p>
</div>
</div>
<div class="swiper-slide d-demo__slide">
<div class="d-demo__slide-bg" style="background-image: url('./images/img-parallax-swiper-img05.jpg');" data-swiper-parallax-x="90%"></div>
<div class="d-demo__slide-heading">
<h3 class="d-demo__slide-ttl">SLIDER005</h3>
<p class="d-demo__slide-txt" data-swiper-parallax-x="30%" data-swiper-parallax-opacity="0">
The American physician and missionary Thomas Staughton
Savage and naturalist Jeffries Wyman first described the
western gorilla (they called it Troglodytes gorilla) in 1847
from specimens obtained in Liberia.
</p>
</div>
</div>
</div>
</div>
<!-- /本体swiper-->
<!-- サムネイルswiper-->
<div class="swiper-container swiper-container-nav js-slider-nav" style="--swiper-navigation-color: #000">
<div class="swiper-wrapper" role="navigation">
<div class="swiper-slide d-demo__nav">
<div class="d-demo__nav-bg" style="background-image: url('./images/img-parallax-swiper-img01.jpg');">
<div class="d-demo__nav-heading">
<p class="d-demo__nav-ttl">SLIDER001</p>
</div>
</div>
</div>
<div class="swiper-slide d-demo__nav">
<div class="d-demo__nav-bg" style="background-image: url('./images/img-parallax-swiper-img02.jpg');">
<div class="d-demo__nav-heading">
<p class="d-demo__nav-ttl">SLIDER002</p>
</div>
</div>
</div>
<div class="swiper-slide d-demo__nav">
<div class="d-demo__nav-bg" style="background-image: url('./images/img-parallax-swiper-img03.jpg');">
<div class="d-demo__nav-heading">
<p class="d-demo__nav-ttl">SLIDER003</p>
</div>
</div>
</div>
<div class="swiper-slide d-demo__nav">
<div class="d-demo__nav-bg" style="background-image: url('./images/img-parallax-swiper-img04.jpg');">
<div class="d-demo__nav-heading">
<p class="d-demo__nav-ttl">SLIDER004</p>
</div>
</div>
</div>
<div class="swiper-slide d-demo__nav">
<div class="d-demo__nav-bg" style="background-image: url('./images/img-parallax-swiper-img05.jpg');">
<div class="d-demo__nav-heading">
<p class="d-demo__nav-ttl">SLIDER005</p>
</div>
</div>
</div>
</div>
<div class="swiper-button-prev"></div>
<div class="swiper-button-next"></div>
</div>
<!-- /サムネイルswiper-->
</div>
</div>重要な部分を説明します。
Swiperを動かすために必要なHTML構造とクラス名は決まっているのでそこから外れないようにしましょう。そして以下の2つのクラス名はメイン部分とサムネイル部分のスライドを動かすために必要なので、忘れずにつけてください。
- 7行目にあるjs-slider … メイン部分を動かすためのクラス名
- 75行目にあるjs-slider-nav … サムネイル部分を動かすためのクラス名
あとはパララックスさせるために必要なdata属性には以下を使っています。
- data-swiper-parallax-x … 水平方向の表示される前の移動位置を指定
- data-swiper-parallax-opacity … 表示される前の透明具合を指定
CSSで書くこと
すべてのcssを載せておきます。
@import url('https://fonts.googleapis.com/css2?family=Poppins:wght@400;800&display=swap');
.swiper-container {
  overflow: hidden;
  position: relative;
}
.d-demo {
  width: 100%;
  display: flex;
  flex-wrap: wrap;
  position: relative;
  padding-bottom: 60px;
}
.d-demo__heading {
  width: 20%;
  position: relative;
}
.d-demo__ttl {
  width: 20%;
  max-width: 55px;
  position: absolute;
  top: 50%;
  left: 50%;
  transform: translate(-50%, -50%);
}
.d-demo__slider {
  width: 80%;
}
.d-demo__slide {
  width: 100%;
  overflow: hidden;
  -webkit-backface-visibility: hidden;
  will-change: transform;
}
.d-demo__slide-bg {
  position: absolute;
  top: 0;
  left: 0;
  width: 100%;
  height: 100%;
  background-position: center;
  background-size: cover;
  overflow: hidden;
  -webkit-backface-visibility: hidden;
  will-change: transform;
}
.swiper-container-main {
  height: calc(100vh - 216px);
  transition: opacity 0.6s ease, transform 0.3s ease;
}
.d-demo__slide-heading {
  position: absolute;
  top: 32%;
  left: 0;
  width: 50%;
  padding-left: 5%;
  color: #fff;
}
.d-demo__slide-ttl {
  font-size: 30px;
  font-family: 'Poppins', sans-serif;
  font-weight: 800;
  margin-bottom: 30px;
}
.d-demo__slide-txt {
  font-size: 13px;
  font-family: 'Poppins', sans-serif;
  font-weight: 400;
  line-height: 1.4;
  transform: translateX(50px);
}
.swiper-container-nav {
  width: 50%;
  height: 13%;
  position: absolute;
  right: 0;
  bottom: 3.5%;
  z-index: 10;
}
.d-demo__nav {
  cursor: pointer;
}
.d-demo__nav-bg {
  position: absolute;
  top: 0;
  left: 0;
  width: 100%;
  height: 100%;
  background-position: center;
  background-size: cover;
  overflow: hidden;
  -webkit-backface-visibility: hidden;
  will-change: transform;
}
.d-demo__nav:before {
  position: absolute;
  width: 100%;
  height: 100%;
  top: 0;
  left: 0;
  bottom: 0;
  right: 0;
  background-color: rgba(0, 0, 0, 0.55);
  transition: background-color 0.3s ease;
  content: '';
  z-index: 1;
  transform:translateZ(1px); //safari対策
}
.swiper-slide-active.d-demo__nav:before {
  background-color: rgba(0, 0, 0, 0);
}
.d-demo__nav:hover:before {
  background-color: rgba(0, 0, 0, 0);
}
.d-demo__nav-heading {
  width: 100%;
  height: 100%;
  display: flex;
  justify-content: center;
  align-items: center;
  font-family: 'Poppins', sans-serif;
  font-weight: 800;
  color: #fff;
  font-size: 15px;
}
 .swiper-container-nav .swiper-button-prev,
  .swiper-button-next {
    --swiper-navigation-size: 12px;
    background-color: #fff;
    border-radius: 50%;
    width: 25px;
    height: 25px;
}
メインスライダー部分の高さをvhで設定していますが、iOS版Safariのことも考えるとJavaScriptで高さを設定したほうが良いでしょう。以下が実装に役立ちます。
JavaScriptで書くこと
パララックスで動かす指定を書いていきます。
window.addEventListener('load', () => {
    const sliderTarget = '.js-slider'; //メインのスライダー
    const navSliderTarget = '.js-slider-nav'; //サムネイルのスライダー

    const sliderElem = document.querySelector(sliderTarget);
    const navSliderElem = document.querySelector(navSliderTarget);

    if (sliderElem === null && navSliderElem === null) return;

    //メインのスライダーのオプション
    const sliderParams = {
      loop: true, // ループさせる
      loopAdditionalSlides: 10, // ループのときに作られるクローンの枚数。
      parallax: true, // パパラックスさせる
      allowTouchMove: false, // マウスでのスワイプを禁止
    };

    //サムネイルのスライダーのオプション
    const navSliderParams = {
      loop: true,
      loopAdditionalSlides: 10,
      speed: 1200,
      autoplay: {
        delay: 3000, // 3秒後に次のスライドへ
        disableOnInteraction: false, // ユーザー側で操作してもスライドを止めない
      },
      slidesPerView: 3, // 画面状で見れるスライドの枚数を指定
      centeredSlides: true, // アクティブのスライドを中央にする
      allowTouchMove: false, // マウスでのスワイプを禁止
      slideToClickedSlide: true, // スワイプ中にクリックした時、今の動きをキャンセルしてクリックした側のスライドに移動する
      navigation: {
        // 左右のページ送りを有効にする
        nextEl: '.swiper-button-next',
        prevEl: '.swiper-button-prev',
      },
    };

    const slider = new Swiper(sliderTarget, sliderParams);
    const navSlider = new Swiper(navSliderTarget, navSliderParams);

    slider.controller.control = navSlider; // メインスライダーとナビの紐付け
    navSlider.controller.control = slider; // ナビとメインスライダーの紐付け
  });
スライダー本体とサムネイルを連動させるには、41行目と42行目にあるcontrollerでお互いを紐づける必要があります。
Swiperではオプションが豊富に用意されています。詳しくは公式で確認してみてください。
注意点について
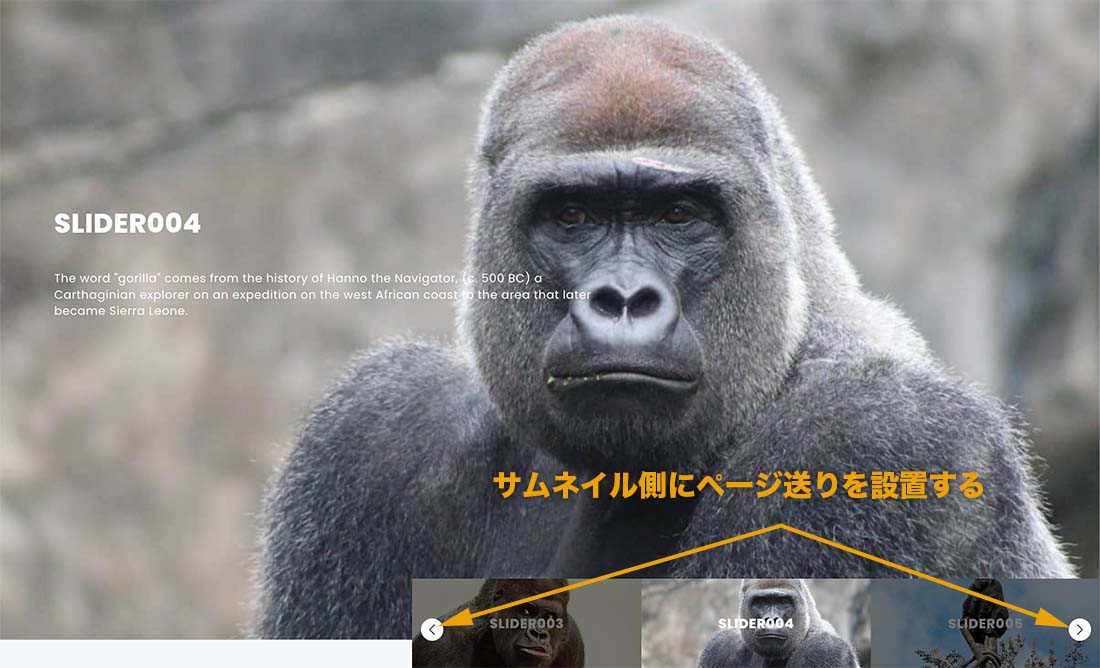
オートプレイ機能がある場合、スライダー本体に左右のページ送りや、スワイプ機能を実装してしまうと、サムネイル側のスライドするタイミングとズレる場合があります。
解決策としてはオートプレイ機能は使わないない、もしくはスライダー本体にはページ送りやスワイプ機能は実装せず、サムネイル側だけに実装します。
さいごに
Swiperでパララックス スライダーを実装する方法を紹介しました。サイトに奥行きを出したいときに使えるスライダーです。注意点としてはEdgeで見るとガタつきが発生する場合があります。その場合はユーザーエージェントを使ってEdgeのみフェードで表示させるなど調整したほうが良いでしょう。
Swiperを使ったスライダーについては、他の記事にも書いているので興味のある方はどうぞ。


で手書き文字をトレースして書き出す方法")
