
スマホ表示でもパララックス!simpleParallax.jsの使い方 - IE11対応済み
今回はスマホ表示でもパララックスができるsimpleParallax.jsの使い方を紹介します。
実装内容は以下
- スマホでもタブレットでもパララックスさせる
- background-imageではなく、imgで実装
- jQueryは使わない
- IE11に対応させる
説明する環境は以下
- macOS Catalina v10.15.5
- Visual Studio Code v1.46.1
スマホでもパララックス!simpleParallax.jsの使い方
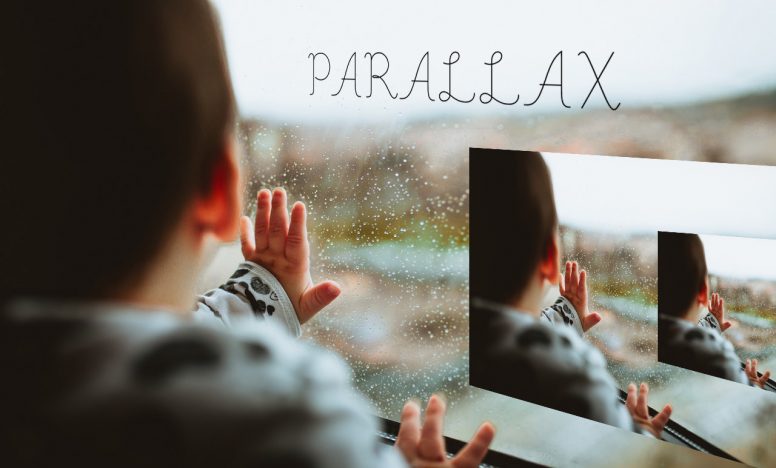
simpleParallax.jsを選んだ理由は、imgで実装できるため、background-imageで起こるスマホでのガタつきがありません。またCSSだけで実装したパララックスと違い、ヌルッとしたパララックス表示が可能です。
scrollイベントではなく、InterSection Observerを使ってパララックスさせるためブラウザの負荷が低いのも特徴です。
simpleParallax.jsを読み込む
CDNがあるので、以下の1行を</body>前に追加してsimpleParallax.jsを読み込みます。
<script type="text/javascript" src="//cdn.jsdelivr.net/npm/simple-parallax-js@5.6.2/dist/simpleParallax.min.js"></script>ダウンロードして読み込みたい方はgithubからどうぞ。
HTMLに書くこと
<div class="p-kv">
	<div class="p-kv__img">
		<img src="./images/img-Kv.jpg" alt="" class="js-target-parallax">
	</div>
</div>通常の画像を表示させるのと同じようにimgを使います。パララックスさせるimgに対してクラス名js-target-parallaxを指定します。
Sassで書くこと
.p-kv__img{
  width: 100%;
  height: 18vw;
  min-height: 320px;
  overflow: hidden;

   img{
     width: 100%;
   }
}
画像を囲む要素に高さを指定して、それ以外のエリアはoverflow: hidden;で非表示にします。高さはお好みで設定してください。
Javascriptで書くこと
init.jsなどのファイルを作り、以下のコードを書いて読み込みます。
document.addEventListener("DOMContentLoaded", function () {

  const elem = document.querySelector(".js-target-parallax");
  if (elem !== null) { //クラス名js-target-parallaxがあるか判定
    let target = document.getElementsByClassName("js-target-parallax"); //クラス名js-target-parallaxがある要素をすべて取得

    let parallaxConfig = { //simpleParallaxの設定
      delay: 0,
      orientation: "down",
      scale: 1.4,
      //overflow: true, //必要なら
      //maxTransition : 50 //必要なら
    };

   const parallax_instance = new simpleParallax(target, parallaxConfig);

  }
});
動きを決めるパラメーターは以下の通りです。必要なものだけを説明します。
- delay … スクロールを止めてから動き続ける秒数。秒数で指定
- orientation … パララックスさせる方向。down、up、left、right、up left、up right、down left、down rightの8方向に動かせる。
- scale … パララックスの効果量。1以上の数値を指定。数値が高いほどパララックスの効果が大きくなる。
- overflow … imgを囲っている要素にぴったり収まるかどうか。trueにすると綺麗に収まるが、パララックスの方向、画像のサイズによっては余白が生じる。
- maxTransition … どのくらいの表示されたらパララックスを止めるか。1〜99の数値で指定。
delayについては、iosでバグがあるため、delay: 0で指定しておいたほうが良いでしょう。
overflowについては、画像のサイズを活かして表示させたいならtrue、画像のサイズ関係なしに親ボックスいっぱいに広げたいならfalseにします。falseにすると、クラス名simpleParallaxがついたdivが、imgの囲むようになります。
その他のパラメーターについて、さらに詳しく知りたい方は以下からどうぞ。
以下のデモページで動きを確認してみてください。
スマホやタブレットごとに画像を変えたい場合は?
パララックスの難しいところは、画面サイズによって表示位置がズレてしまうことです。そこでPC、タブレット、スマホ表示でパララックスさせる画像を切り替える設定をします。それぞれの表示にあった3枚の画像を用意しましょう。
HTMLに書くこと
画像の名前だけ変更します。PC、タブレット、スマホ表示用の画像はそれぞれ以下のように設定。最後の文字列を判定して画像を切り替えます。
- PC画像なら画像名の最後に_pcとつける。(例:parallax_pc.jpg)
- タブレット画像なら画像名の最後に_tbとつける。(例:parallax_tb.jpg)
- スマホ画像なら画像名の最後に_spとつける。(例:parallax_sp.jpg)
<div class="p-kv">
	<div class="p-kv__img">
   <!--PC表示用の画像を設定しておく-->
		<img src="./images/img-Kv_pc.jpg" alt="" class="js-target-parallax">
	</div>
</div>
Javascriptで書くこと
matchMediaを使うと、cssと同じようにmediaクエリのブレイクポイントで判定できます。
document.addEventListener("DOMContentLoaded", function () {
  const elem = document.querySelector(".js-target-parallax");
  if (elem !== null) {
    let target = document.getElementsByClassName("js-target-parallax");
    let parallaxConfig = {
      delay: 0,
      orientation: "down",
      scale: 1.4
    };

    const parallax_instance = new simpleParallax(target, parallaxConfig);


    const breakpoint_P = window.matchMedia("(min-width: 961px)"); //PC用のブレイクポイント
    const breakpoint_T = window.matchMedia("(min-width: 561px) and (max-width: 960px)");//タブレット用のブレイクポイント
    const breakpoint_S = window.matchMedia("(max-width: 560px)"); //スマホ用のブレイクポイント

    //サイトが表示されたときに1番最初に行われる設定
    function checkBreakPoint(breakpoint_P_get, breakpoint_T_get, breakpoint_S_get) {
      for (let i = 0; i < target.length; i++) {
        let target_src = target[i].getAttribute("src");

        if (breakpoint_P_get.matches) {
          let replace_src = target_src.replace("_sp", "_pc").replace("_tb", "_pc");
          target[i].setAttribute("src", replace_src);
        } else if (breakpoint_T_get.matches) {
          let replace_src = target_src.replace("_pc", "_tb").replace("_sp", "_tb");
          target[i].setAttribute("src", replace_src);
        } else if (breakpoint_S_get.matches) {
          let replace_src = target_src.replace("_pc", "_sp").replace("_tb", "_sp");
          target[i].setAttribute("src", replace_src);
        }
      }
      parallax_instance.refresh();
    }

    //画面サイズが961px以上になると行われる設定
    function checkBreakPoint_pc(breakpoint_P) {
      for (let i = 0; i < target.length; i++) {
        let target_src = target[i].getAttribute("src");

        if (breakpoint_P.matches) {
          let replace_src = target_src.replace("_sp", "_pc").replace("_tb", "_pc");
          target[i].setAttribute("src", replace_src);
        }
      }
      parallax_instance.refresh();
    }

    //画面サイズが561px以上960px以下になると行われる設定
    function checkBreakPoint_tb(breakpoint_T) {
      for (let i = 0; i < target.length; i++) {
        let target_src = target[i].getAttribute("src");

        if (breakpoint_T.matches) {
          let replace_src = target_src.replace("_pc", "_tb").replace("_sp", "_tb");
          target[i].setAttribute("src", replace_src);
        }
      }
      parallax_instance.refresh();
    }

    //画面サイズが560px以下になると行われる設定
    function checkBreakPoint_sp(breakpoint_S) {
      for (let i = 0; i < target.length; i++) {
        let target_src = target[i].getAttribute("src");

        if (breakpoint_S.matches) {
          let replace_src = target_src.replace("_pc", "_sp").replace("_tb", "_sp");
          target[i].setAttribute("src", replace_src);
        }
      }
      parallax_instance.refresh();
    }

    // ブレイクポイントごとにそれぞれの設定が発火する
    breakpoint_P.addEventListener("change", checkBreakPoint_pc);
    breakpoint_T.addEventListener("change", checkBreakPoint_tb);
    breakpoint_S.addEventListener("change", checkBreakPoint_sp);

    // 初回チェックで発火
    checkBreakPoint(breakpoint_P, breakpoint_T, breakpoint_S);
  }
});
重要な部分を説明していきます。
const breakpoint_P = window.matchMedia("(min-width: 961px)"); //PC用のブレイクポイント
const breakpoint_T = window.matchMedia("(min-width: 561px) and (max-width: 960px)");//タブレット用のブレイクポイント
const breakpoint_S = window.matchMedia("(max-width: 560px)"); //スマホ用のブレイクポイント
上記は表示を切り替えるブレイクポイントをそれぞれ設定しています。
//サイトが表示されたときに1番最初に行われる設定
    function checkBreakPoint(breakpoint_P_get, breakpoint_T_get, breakpoint_S_get) {
      for (let i = 0; i < target.length; i++) {
        let target_src = target[i].getAttribute("src");

        if (breakpoint_P_get.matches) {
          let replace_src = target_src.replace("_sp", "_pc").replace("_tb", "_pc");
          target[i].setAttribute("src", replace_src);
        } else if (breakpoint_T_get.matches) {
          let replace_src = target_src.replace("_pc", "_tb").replace("_sp", "_tb");
          target[i].setAttribute("src", replace_src);
        } else if (breakpoint_S_get.matches) {
          let replace_src = target_src.replace("_pc", "_sp").replace("_tb", "_sp");
          target[i].setAttribute("src", replace_src);
        }
      }
      parallax_instance.refresh();
    }
上記は一番最初にサイトが読み込まれたときに行う設定です。
3つのブレイクポイントを読み込み、machesで条件分岐させています。
ブレイクポイントに合わせて、画像パスにある_pc、_sp、_tbの部分を切り替えています。例えばスマホ表示だった場合、画像パスがpararallx_pc.jpgのままなら、pararallx_sp.jpgに切り替えています。
parallax_instance.refresh();上記の1行は画像の切り替えが完了したら、画像の位置を再計算させる設定です。
checkBreakPoint(breakpoint_P, breakpoint_T, breakpoint_S);最後に設定した内容を82行目で発火させています。
次に画面サイズが設定したブレイクポイントに到達したときの処理です。560px以下になったら発火する設定、569〜960pxの間で発火する設定、961px以上で発火する設定をそれぞれ書きます。
//画面サイズが560px以下になると行われる設定
    function checkBreakPoint_sp(breakpoint_S) {
      for (let i = 0; i < target.length; i++) {
        let target_src = target[i].getAttribute("src");

        if (breakpoint_S.matches) {
          let replace_src = target_src.replace("_pc", "_sp").replace("_tb", "_sp");
          target[i].setAttribute("src", replace_src);
        }
      }
      parallax_instance.refresh();
    }
例えば560px以下の場合の設定は上のように書いています。
breakpoint_S.addEventListener("change", checkBreakPoint_sp);79行目で560px以下になったときに発火する指定を書きます。
IE11対策するには?
simpleParallax.jsはIE11に対応していません。そこでpolyfillを読み込んでIE11でも動くようにします。以下のPolyfill.ioというサイトを使って、IE11未対応のメソッドを補完します。
Polyfill.ioから取得した以下の1行をheadの中に追加します。これでIE11でもsimpleParallax.jsを動かすことができます。
<script type="text/javascript" src="https://polyfill.io/v3/polyfill.min.js?features=Element.prototype.closest%2CArray.from%2CIntersectionObserver%2CObject.assign%2CArray.prototype.includes%2CString.prototype.includes"></script>さいごに
今回はスマホでもパララックスできるsimpleParallax.jsの使い方について紹介しました。
imgを使って実装するため、スマホでもガタつくことなく表示できますし、polyfillさえ読み込ませればIE11でも他のブラウザと同じようにパララックスできます。scrollイベントも使っていないのでサイトが重くならこともポイントです。
パララックスできるプラグインについては他にも紹介しているので参考にしてみてください。


で手書き文字をトレースして書き出す方法")